A Step-by-Step Guide on How to Install the Epson L4260 Printer
The Epson L4260 printer is a popular choice for both home and office use due to its efficient printing capabilities and user-friendly features. If you have recently purchased this printer and are wondering how to install it, look no further. In this article, we will provide you with a step-by-step guide on how to install the Epson L4260 printer, from unpacking the device to connecting it with your computer. So let’s get started.
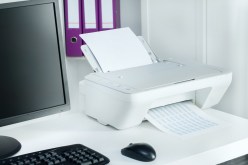
Unpacking and Setting Up
When you receive your Epson L4260 printer, the first step is to unpack it carefully. Open the package and ensure that all the components are included – the printer itself, ink bottles, power cord, USB cable (if applicable), and any other accessories mentioned in the user manual.
Next, find a suitable location for your printer. It should be placed on a flat surface near an electrical outlet. Make sure there is enough space around it for proper ventilation.
Installing Ink Bottles
Once you have set up your printer in its designated spot, it’s time to install the ink bottles. The Epson L4260 uses individual ink bottles instead of cartridges, which allows for easy replacement and cost-effective printing.
Start by opening the ink tank cover located on the front or top of your printer. Carefully remove each bottle from its packaging and shake them gently before opening. Remove the cap from each bottle and insert them into their respective color-coded tanks – cyan into cyan tank, magenta into magenta tank, yellow into yellow tank, and black into black tank.
322166814/www.simpli.com/Simpli_Desktop_Feed_Center_1_Dynamic_728x90Securely close each bottle after inserting them to prevent any leakage or drying out of ink. Once all bottles are properly installed, close the ink tank cover.
Connecting to Power Source
To ensure that your Epson L4260 printer functions properly, it needs to be connected to a power source. Plug one end of the power cord into the printer’s power input port and the other end into a standard electrical outlet.
Once you have connected the power cord, turn on your printer by pressing the power button. You will see a startup screen or indicator lights that indicate your printer is ready for the next step.
322166814/www.simpli.com/Simpli_Desktop_Feed_Center_2_Dynamic_728x90Connecting to Computer
Now that your Epson L4260 printer is powered on, it’s time to connect it to your computer. Depending on your computer and printer model, there are two ways you can establish this connection – via USB cable or wirelessly.
If you prefer a wired connection, connect one end of the USB cable to your computer’s USB port and the other end to the corresponding port on your printer. Ensure that both ends are securely plugged in.
322166814/www.simpli.com/Simpli_Desktop_Feed_Center_3_Dynamic_728x90For wireless connectivity, navigate to your printer’s control panel and select “Wireless Setup.” Follow the instructions provided on-screen to connect your printer with your Wi-Fi network. Once successfully connected, you can proceed with installing any necessary drivers or software for optimal performance.
Conclusion
Installing the Epson L4260 printer is a straightforward process that requires careful unpacking, ink bottle installation, connecting it to a power source, and establishing a connection with your computer. By following this step-by-step guide, you can easily set up and start using your Epson L4260 printer in no time. Enjoy high-quality printing and efficient performance with this versatile device.
This text was generated using a large language model, and select text has been reviewed and moderated for purposes such as readability.
322166814/www.simpli.com/Simpli_Desktop_Feed_Center_4_Dynamic_728x90 322166814/www.simpli.com/Simpli_Desktop_Slideshow_Center_1_728x90